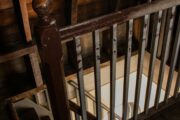
Keeping your baby safe is every parent’s top priority, especially when they start crawling or walking. Stairs, kitchens, and open doorways suddenly become potential danger zones. While store-bought baby gates are convenient, they can be costly or not fit perfectly with your home’s layout. That’s where DIY baby gates come in they’re affordable, customizable, and can blend seamlessly with your home decor.
This guide will walk you through everything you need to know about making your own baby gates from design ideas and materials to installation tips and safety considerations.
1. Why Choose a DIY Baby Gate?
Before you start building, it’s essential to understand why a DIY baby gate can be a great option:
- Cost-effective: Pre-made baby gates can range from ₹2,000 to ₹10,000 or more. DIY versions can be made with minimal cost using materials you already have.
- Custom fit: Many homes have unique staircases or wide openings that don’t match standard gate sizes. DIY gates can be built to the exact dimensions you need.
- Aesthetic appeal: You can match your gate’s design to your home’s interior — rustic, modern, farmhouse, or minimalist.
- Satisfaction of crafting: Building something with your own hands gives a sense of pride and personalization that store-bought gates can’t provide.
2. Choosing the Right Type of Baby Gate
There are several types of baby gates you can make depending on your space and needs:
- Swing Gate: Opens like a regular door; perfect for the top or bottom of stairs.
- Sliding Gate: Moves horizontally; suitable for narrow hallways or doorways.
- Retractable Fabric Gate: Uses durable fabric or mesh; ideal for temporary or low-traffic areas.
- Foldable Wooden Gate: Great for flexibility and easy storage when not in use.
When deciding on the design, consider where you’ll install the gate and how often it needs to be opened and closed.
3. Materials You’ll Need
The materials will depend on your chosen design, but here’s a general list for a wooden swing-style gate, the most common DIY option:
- Wooden planks or slats (pine or oak are good choices)
- Screws and hinges
- Drill and screwdriver
- Measuring tape
- Sandpaper and paint or varnish
- Latch or hook lock
- Mounting brackets or anchors
- Optional: Metal mesh or acrylic panel for added safety
You can adjust materials for a fabric or PVC gate by substituting wood with metal rods or sturdy fabric.
4. Measuring Your Space
Accurate measurement is crucial for a secure fit.
- Measure the width of the doorway or stair opening where you plan to install the gate.
- Measure the height – baby gates are typically around 28–36 inches (70–90 cm) tall.
- Leave a small clearance (about half an inch) at the bottom so the gate doesn’t scrape the floor.
Mark these dimensions clearly before cutting or assembling any parts.
5. Building Your DIY Baby Gate (Wooden Swing Gate Example)
Here’s a step-by-step guide to building a simple yet strong wooden gate:
Step 1: Cut and Prepare the Wood
Cut your wooden planks to match your measurements. Sand down rough edges to prevent splinters.
Step 2: Create the Frame
Use two vertical and two horizontal planks to form a rectangle. Secure them with screws or wood glue. Make sure it’s square and even.
Step 3: Add Slats or Panels
Attach vertical slats evenly spaced (about 2–3 inches apart) to prevent babies from slipping through. Alternatively, you can attach a solid panel or mesh for full coverage.
Step 4: Sand and Paint
Smooth the entire gate with sandpaper. Apply a child-safe, non-toxic paint or varnish that matches your interior. Allow it to dry completely.
Step 5: Install Hinges and Latch
Attach hinges on one side and a latch on the other. Mount the gate securely to the wall or banister using heavy-duty screws and brackets.
Step 6: Test for Stability
Once installed, open and close the gate several times to check for smooth movement. Ensure the latch locks firmly and the gate doesn’t wobble.
6. Safety Tips for DIY Baby Gates
Even though it’s DIY, safety must always come first. Here’s what to keep in mind:
- Use strong materials: Avoid thin plywood or flimsy fabric. The gate should withstand a toddler’s weight if they lean or push against it.
- Avoid large gaps: Keep spaces smaller than 3 inches to prevent your baby from slipping through or getting stuck.
- Secure mounting: Use wall anchors or banister adapters to ensure the gate stays firmly in place.
- Height matters: The gate should be tall enough that your child can’t climb over it.
- No sharp edges: Sand down all corners and check for protruding screws or splinters.
- Test regularly: As your child grows, recheck the gate’s strength and adjust if necessary.
7. Creative DIY Baby Gate Ideas
If you love adding a personal touch to your home, here are a few creative ideas:
- Rustic farmhouse style: Use reclaimed barn wood and wrought iron hinges for a charming, country-inspired look.
- Modern minimalist: Use white-painted wood or acrylic panels for a sleek, clean aesthetic.
- Fabric retractable gate: Use strong canvas or mesh with Velcro fasteners for lightweight protection that’s easy to remove.
- Chalkboard gate: Paint one side with chalkboard paint so kids can doodle when they’re older, a functional and fun addition!
8. Installing Baby Gates on Stairs
Stairs are one of the most dangerous spots in the house for babies, so installing a gate here requires extra caution.
- Top of stairs: Always use hardware-mounted gates, never pressure-mounted ones. They offer a stronger, more secure fit.
- Bottom of stairs: Pressure-mounted gates are acceptable here as long as they fit tightly and don’t shift.
- Banister installation: If you can’t drill into your banister, use a no-drill mounting kit or zip-tie method with a wooden post.
Safety should always come before convenience when it comes to stair gates.
9. Pros and Cons of DIY Baby Gates
Pros:
- Customizable design and size
- Budget-friendly
- Matches your home decor
- Can be reused or repurposed
Cons:
- Requires time, tools, and basic carpentry skills
- May not meet all safety certifications
- Needs periodic maintenance and checks
If you’re confident in your craftsmanship and follow safety standards, a DIY baby gate can be just as reliable as a store-bought one.
10. Maintenance and Long-Term Use
Your baby gate will go through a lot of wear and tear, especially as your child becomes more active. To keep it safe and functional:
- Inspect hinges and latches regularly.
- Tighten loose screws or replace damaged parts.
- Repaint or refinish if wood begins to chip or peel.
- Retire the gate once your child can climb over or open it independently.
Conclusion
A DIY baby gate is an affordable, practical, and rewarding project for parents who want to create a safe environment while maintaining their home’s style. With the right materials, careful measurements, and safety-focused design, you can craft a barrier that’s both functional and beautiful.
Whether you opt for a classic wooden swing gate, a modern acrylic style, or a retractable fabric version, your homemade baby gate will give you peace of mind, knowing your little one can explore safely within secure boundaries.
In the end, it’s not just about building a gate, it’s about building safety, creativity, and love into your home.


